Programming an NES Emulator from Scratch in Rust
Sep 19, 2019 | 10 minute read

I decided several months ago that it'd be a neat idea to create my own NES emulator using my new favorite language: Rust. Little did I know how complicated it would be or how much of my soul would be required (and I'm not even finished!). My story starts shortly after I registered for my final few courses finishing my Bachelors of Computer Science. One of those courses was called "Rust Programming". In preparation for the course, I decided I should learn a bit about it before class started because I had only heard about it in passing. I immediately fell in love with it.
Now, don't get me wrong, there were certainly growing pains. There were some new ideas to get used to like borrow checking and lifetimes, but I slowly managed to get used to things and got really excited for class to begin. One of the course requirements was completing a decently sized code project that would span several weeks, and thus I began my search for the perfect Rust project. I've been into classic video games for years now and have played several emulators over that time, so I figured that might be a solid place to start. When I discovered there were barely any fully functional NES emulators written in Rust, I decided this would be the perfect project. The NES is an old platform so it should be simple to emulate right? Right. Little did I know...
This project has been a labor of love, with much pain and frustration mixed with the joy and satisfaction. I'd like to share some of my journey in, what will likely turn out to be, a many part series. My intention is to highlight the many benefits of embarking on such a large project and perhaps help caution against some of the pitfalls. I've learned so much from this endeavor and expanded my ability as a programmer. Also, while I understand why the NES Dev wiki discourages new emulator development, I highly encourage anyone interested to either start their own as just a toy project, or help collaborate on an existing project as it is highly informative and rewarding.
You can check out the code for this project on github and play it on the web!
Here are some of the things this series will cover:
- How does software emulation of hardware like the NES work?
- What features does an emulator require?
- What games can be played?
- How are games emulated?
- How did I approach emulating the NES from scratch using Rust?
- How was using Rust in such a low-level environment?
- What are some of the features of my implementation?
- What's the current status/future of the project?
Current Status
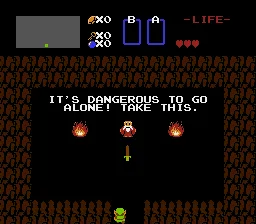
There are currently 7 mappers completely implemented with 1 more in progress. I'll cover more on what mappers are later, but these 8 mappers will allow around 84% of NES games to be playable. Many of the remaining games are Japanese released games, obscure games, or homebrew games. These mappers include many popular titles including all of the Super Mario games, Zelda, Metroid, Final Fantasy, and Castlevania among many others.
Current Features:
- Runs at a stable ~60 FPS even with the PPU debugging feature enabled, even on relatively low-end machines (Testing/Development was done on a 2013 Macbook Air)
- Average FPS Counter in title bar
- Can use either Keyboard or an Xbox style controller as input
- Supports Turbo keys
- Fast Forward and Speed Increase/Decrease
- Reset/Power Cycle emulation
- Save/Load any time during gameplay (4 save slots) - Finally beat those games you never could with flawless play throughs
- Fullscreen/Windowed modes
- Toggle Sound on/off
- Take screenshots of your epic adventures
- PPU Debugger - See what the Picture Processing Unit graphics look like in memory in real time
- CPU Debugger - Pause and step through single CPU instructions at a time, or step whole frames at a time
Future Features:
- Action recording (Record inputs and play them back)
- Sound recording (Save those classic 8-bit tunes)
- Configuration menus (Currently, all configuration is done via command line flags)
- Custom keybinds
- Network multi-player - play 2-player classics with friends!
- Advanced debugging support for NES game developers
- Web-assembly front-end to enable browser play cross-platform
- Game Genie
- WideNES - A feature where the game level map is recorded as you progress, allowing you to zoom out and see the whole game world at once
- A Headless mode - could be useful to automate NES testing suites or play around with AI learning algorithms
Code Statistics
- Source Lines of Code : 8513
- Comments : 1324
- Number of files : 24
- Number of commits : 166
Overall, I'm very happy with the project and its performance, but I'm a perfectionist and there's still a lot to do. There are many crusty corners that I'd like to substantially refactor. Frustration got the better of me at times and in an attempt to just get things working, I left my "best practices" at the door. Rust was a fantastic choice for this project, especially once you get past the strict constraints Rust puts on you. I certainly struggled a lot early on in development because Rust limits variable ownership and mutable state and the prime thing this project is attempting to emulate is hardware where everything is globally mutable.
Emulator Overview
The NES hardware is composed of the following six components:
- CPU - A Ricoh RP2A03 Central Processing Unit based on the MOS6502, modified to disable the binary decimal mode and include support for the APU.
- PPU - Picture Processing Unit. This does the bulk of the work putting out pixels. It's based on the Ricoh RP2C02.
- APU - Audio Processing Unit. While the original hardware combined the CPU and the APU into the RP2A03, I've emulated it as a separate module for ease of maintenance.
- Memory Mapped I/O - This includes built in writable RAM (WRAM) in the NES console, the APU, Controller Input, Program RAM (PRG-RAM) and read-only memory (ROM) typically located on the Cartridge. ROM is split further into Program ROM (PRG-ROM) and Character ROM (CHR-ROM) used for background and character sprites.
- Controller Input - NES controller input (Start, Select, A, B, and directional buttons).
- Cartridge Board - Each NES game came on a board or "cart" with designated circuitry. Each game had different, pre-defined, circuitries which were called mappers.
The architecture I've chosen groups the CPU, PPU, and APU components inside of a Console module which sits alongside of Input, Memory, and Mapper modules. The current UI module uses the Rust SDL2 libraries to handle the windows, input, graphics and audio. This will be updated to be swappable with a web-assembly implementation in a future version to allow playing the emulator in a modern browser.
In Part 2, I'll go into the details of my implementation and some of the major insights learned along the way.